Keplr
Connect your Keplr wallet with Evmos.
Note: The Keplr extension is officially supported on Chromium-based browsers (i.e. Edge, Chrome, and Brave) and Firefox.
The Keplr browser extension is a wallet for accessing applications in the Cosmos ecosystem and managing user identities. It can be used to connect to Evmos mainnet and testnet and claim rewards, send and stake tokens, interact with governance, and more.
Set Up Keplr
Note: Further information about the process of setting up Keplr can be found in the official Keplr Documentation or in this Medium article.
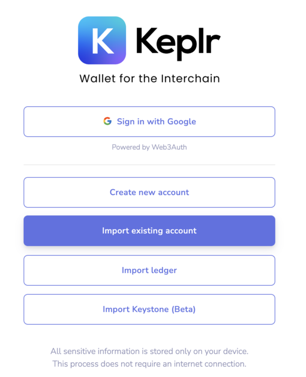
Open the Keplr extension on your browser. If you are setting up Keplr for the first time, you can either create a new account or import an existing account.
Create a New Account
There are several ways to create a new account:
- via a mnemonic/seed phrase
- via one-click login
Create an Account with a Seed Phrase

- In the initial pop-up window, choose Create New Account
- If you have used Keplr before, click on the silhouette in the upper-right corner, then the blue box labeled Add Account, and select Create New Account
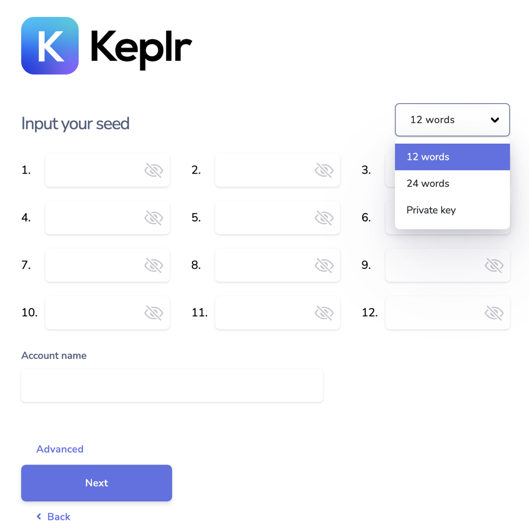
- Choose to have a seed/mnemonic phrase of 24 words, and save the phrase
- You can change the derivation path by clicking on Advanced, but this is optional (learn more in the Keplr FAQ)
- Enter a name for your account (can change later)
- Once you have transcribed your 24 word seed/mnemonic phrase, click on Next
- To confirm the creation of the new account, click on the words on the right order in which they appear in your seed/mnemonic phrase, and press Register
- If you have not used Keplr before, set a strong password for the Keplr extension, and click Confirm
Create an Account with One-Click (Google OAuth) Login
Note: It is suggested to create an account via mnemonic phrase or utilize a Ledger and not use the Sign in with Google.
- Choose the option Sign in with Google
- Now enter the email/phone number associated with your Google account, the password, and click Next
- If you have not used Keplr before, set a strong password for the Keplr extension, and click Confirm
Import an Existing Account
There are several ways to import an existing account:
- via a mnemonic/seed phrase/private key
- via ledger
Import an Account with a Seed Phrase
- In the initial pop-up window, choose Import Existing Account
- If you have used Keplr before, click on the silhouette in the upper-right corner, then the blue box labeled
Add Account, and select Import Existing Account
- Enter your mnemonic/seed phrase/private key in the appropriate slot, separating the words with spaces and taking care to check they are spelled correctly
- Make sure you have imported the account with the correct derivation path, viewable by clicking on Advanced
- Normally, the derivation path should be
m/44'/…’/0/0/0, but if you see that importing the account via mnemonic on Keplr, the Cosmos Mainnet address displayed is different than yours, it is possible the derivation path ends with 1 (or another number) instead of 0 - If this is the case, you just have to start the process over, and replace the last 0 with 1
- Learn more in the Keplr FAQ
- If you have not used Keplr before, set a strong password for the Keplr extension, and click Confirm
Import an Account with a Ledger
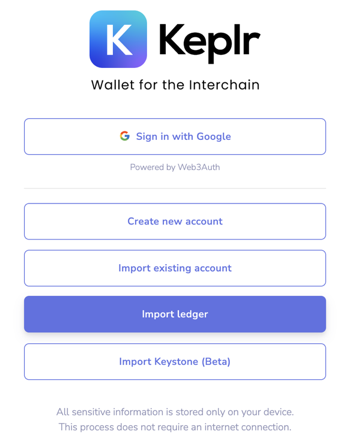
- In the initial pop-up window, choose Import Ledger
- If you have used Keplr before, click on the silhouette in the upper-right corner, then the blue box labeled Add Account, and select Import Ledger
- Be sure you have both the Cosmos and Ethereum Ledger apps downloaded on your Ledger device
- To complete the connection with your Ledger device, follow the steps described in the pop-up that appears (a detailed tutorial can be found here) or another article from a validator.
- If you have not used Keplr before, set a strong password for the Keplr extension, and click Confirm
- Switch to the Ethereum app on the Ledger, then select “Evmos” from the Keplr chain registry to connect the public key
- All signing from Keplr will use the Ledger Ethereum app, with either EIP-712 transactions or standard Ethereum transactions.
Changing RPC/REST on Keplr Wallet
There are times when the wallet's connected RPC or REST is not working and requires an update. Check the networks list for endpoints to use. To change the configuration, follow these steps:
- Click on the Keplr Wallet Extension
- Go to
Settingsand go toEndpoints - Make sure you are on the
Evmos Testnetnetwork from the dropdown. Testnet networks will likely be towards the bottom of the list. - Update either the
RPCorRestor both inputs and clickConfirm
Connect Keplr to Mainnet
Once you are signed in to the Keplr extension, you can connect the wallet with the Evmos network. The Evmos mainnet network
is already built into Keplr and look for the Evmos network by clicking on the extension and scrolling to select the network.
Connect to Evmos Testnet
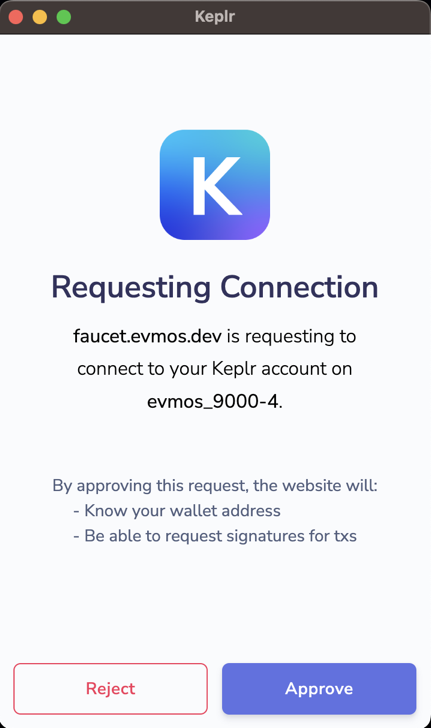
The default network configurations for Keplr comes with mainnet as its default. To connect to the testnet environment,
you will need to head to a site/project that has testnet configuration. A window will request your approval for the chain
and the chain-id. Once approved, the testnet will be selectable under the Beta Support section of Keplr Wallet.
Add Evmos Testnet to Keplr.
Register Interchain Nameservice (ICNS)
ICNS is not the same as ENS (Ethereum Name Service). ICNS is exclusive to Cosmos chain and ENS is exclusive to any EVM-based chains. Since Evmos supports EVM and Cosmos-based actions, both ENS and ICNS are supported. Users can have both ICNS and ENS but be advised that Cosmos-wallets support ICNS while EVM-wallets support ENS.
The Interchain Nameservice is an optional service that allows users to use easy-to-remember names instead of addresses
and many interchain networks support it. To learn more about ICNS, head over to here to learn more. If you are ready to proceed, you will need
Twitter, 0.5 OSMO and signed in Keplr Wallet. If you need to obtain OSMO token, check out
this link. ICNS registration link is here.